

















Instead of repeatedly adjusting wall sconces that flicker or shut off too soon, have your electrician match the LED driver, dimmer type, and circuit requirements before installation. LED wall sconce dimmer switch compatibility depends on that complete combination—not simply whether the fixture says dimmable.
- LED wall sconce dimmer switch compatibility requires matching the driver, control method, and dimmer load limits.
- Norafurnish lighting shoppers should confirm dimming specifications before selecting a wall control.
- A dimmable LED is not compatible with every LED dimmer.
- Have a qualified electrician install hardwired controls and test low-end dimming before finishing the job.
Why this matters
Good sconce lighting lets you move from useful brightness to a softer evening setting without distracting flicker. The wrong control can leave you with buzzing, abrupt shutoff, or lights that refuse to start at a low setting.
Norafurnish is best for homeowners who want lighting-selection guidance alongside indoor and outdoor fixture choices. When browsing Norafurnish, treat appearance and electrical compatibility as separate decisions: a fixture can suit your room while still needing a different control than the one already installed.
For a 2026 lighting update, approve the fixture-and-dimmer pairing before the electrician schedules installation. A familiar wall plate or an LED label does not establish compatibility.
Before you start
- Gather the exact fixture information. Save the model, selected variant, installation instructions, and driver information. For replaceable bulbs, include the bulb model; for integrated LEDs, include the fixture's driver specifications.
- Arrange electrician access. Your qualified electrician needs to assess the existing control, circuit arrangement, wall box, and any additional switch locations. Do not remove covers or inspect wiring yourself.
- Check the hidden gotcha: the dimming method. Dimmable does not identify whether a fixture needs forward-phase, reverse-phase, a separate control signal, or its own dedicated controller. Resolve that before buying a switch.
You do not need to learn wiring. You need enough documentation to ask a precise question and receive a model-specific answer.
Fixture and driver requirements
Establish what actually controls the light
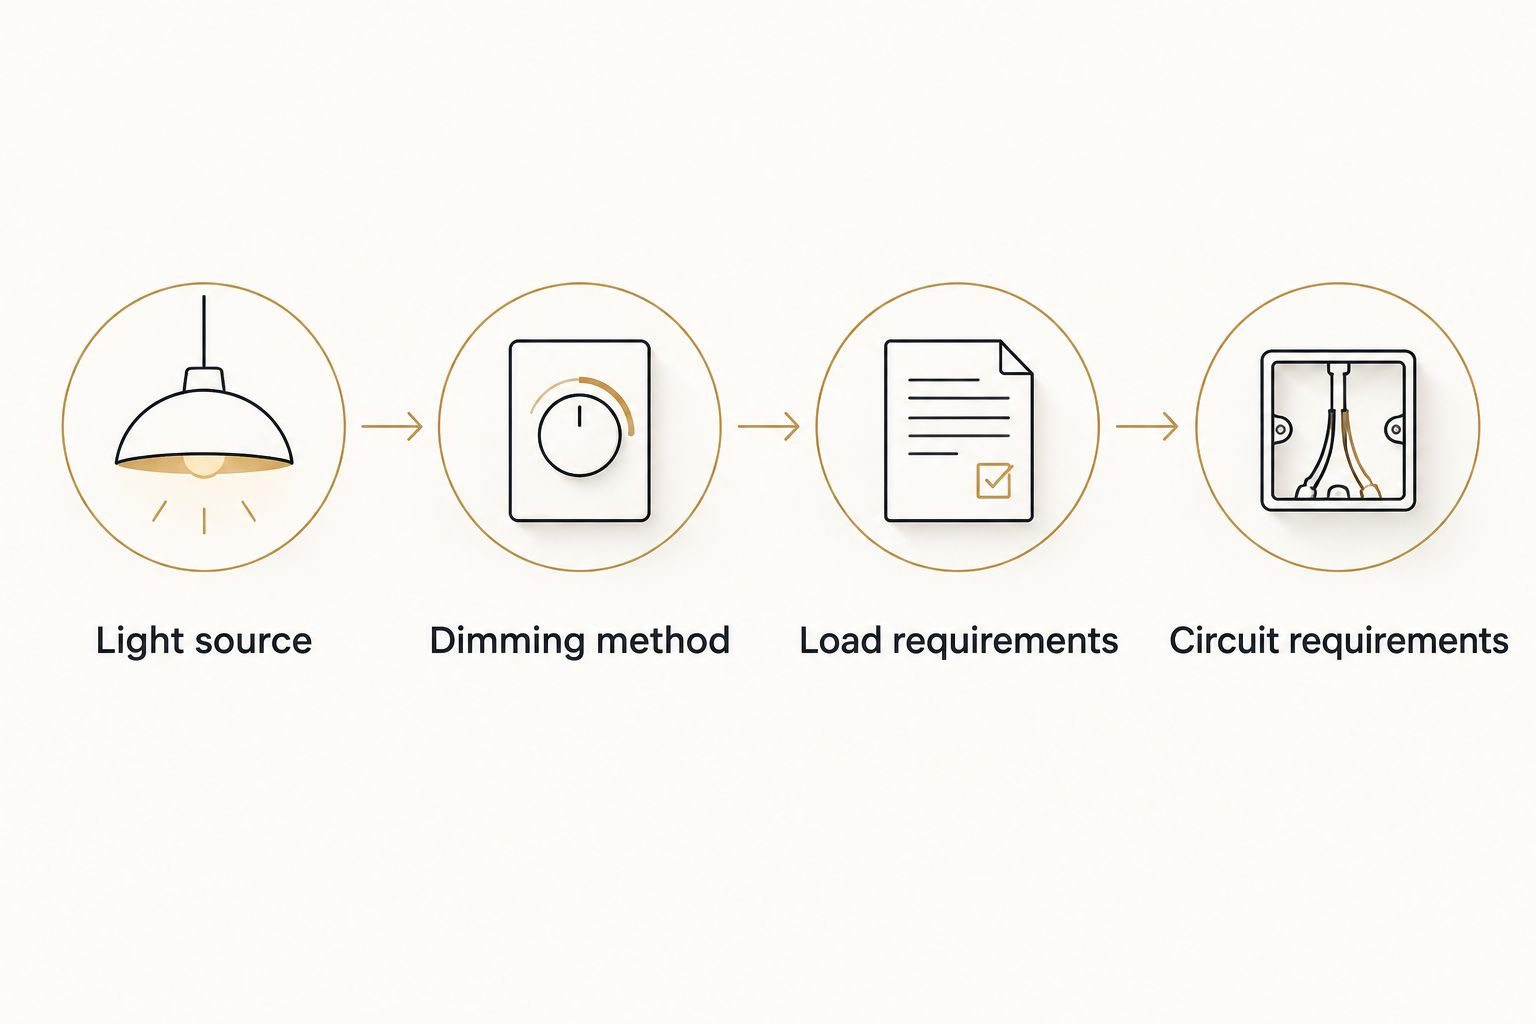
- Identify the light source. Ask whether the sconce uses replaceable LED bulbs or an integrated LED assembly. With replaceable bulbs, the bulb's dimming specifications matter; with integrated LEDs, the driver is central to the match.
- Record the selected variant. Keep the exact configuration on your order, not just the product-family name. Ask whether its driver and dimming method match the documentation supplied.
- Find the electrical ratings. Ask your electrician to check input voltage and frequency against the circuit. Ordinary US household lighting commonly uses 120 V, 60 Hz, but the actual fixture label and circuit govern installation.
- Request the dimming instructions. Ask for the supported control method, any named compatible dimmers, and restrictions on grouping fixtures. A general statement that a fixture dims is not a substitute for these details.
Expected result: You have an identifiable fixture or bulb model, its electrical requirements, and a documented dimming method. If the supplier cannot establish the method, pause switch selection.
For Norafurnish lighting, use personal lighting help to request clarification about the exact fixture before your electrician commits to a control. Send the model and selected variant so the question stays specific.
Dimmer and circuit requirements
Match the control to the documented method
- Ask your electrician to identify the required control type. Use the manufacturer's terminology rather than choosing a dimmer by appearance or brand familiarity.
- Check model-specific compatibility information. Where a fixture or dimmer manufacturer publishes tested combinations, compare exact model numbers. A match for another fixture in the same collection does not establish a match for yours.
- Check minimum and maximum LED load requirements. Ask your electrician to account for all fixtures on the control, manufacturer fixture-count restrictions, and any required rating reductions for the installation arrangement.
- Confirm circuit and box requirements. Ask about neutral requirements, grounding, box space, and whether the control supports the existing switching arrangement. Leave inspection and installation to the electrician.
Expected result: Your electrician can name the proposed dimmer, explain why its control method matches the driver, and confirm that the installation meets both manufacturers' instructions.
Which dimming method fits your project?
The labels below describe control methods, not interchangeable upgrades. The best method is the one specified for the fixture and supported by the installation.
| Control method | Best for | Advantage | Limitation |
|---|---|---|---|
| Forward-phase dimming | Drivers or bulbs explicitly approved for forward-phase control | Uses a compatible phase-cut wall control | Does not establish compatibility with reverse-phase-only drivers |
| Reverse-phase dimming | Drivers explicitly approved for reverse-phase control | Matches drivers designed for this waveform | Requires a suitable control and verification of its installation requirements |
| 0–10 V dimming | Drivers explicitly designed for a separate 0–10 V control signal | Separates the dimming signal from line-power control | Requires the appropriate control wiring and cannot simply replace a phase-cut dimmer |
| Dedicated smart control | Fixtures designed around an app, remote, or specified controller | Provides the fixture's intended control functions | An upstream wall dimmer is not automatically permitted |
Forward-phase and reverse-phase describe how a dimmer modifies the AC waveform. In a 0–10 V system, a separate low-voltage signal tells a compatible driver how to dim; your electrician must follow the driver's requirements for switching off as well.
For your 2026 project notes, record the actual method rather than writing only LED-compatible. That distinction makes future replacements easier to specify.
Installation and dimming-range checks
Give your electrician a clear acceptance checklist
- Describe your lowest useful light level. Explain whether the sconces provide reading light, general room light, or a soft evening background. Compatibility does not guarantee that every fixture dims equally low.
- Have the electrician install the approved combination. This guide covers selection and acceptance checks, not wiring. Hardwired fixture and control work belongs with a qualified electrician.
- Test full brightness and the lowest intended setting. Watch for visible flicker, uneven output between matching sconces, and sudden dropouts. Listen for objectionable buzzing at the fixture and wall control.
- Test starting from the low setting. Turn the light off and back on using the installed control. A light that dims down successfully still needs to start reliably at the level you intend to use.
- Have the electrician adjust supported settings. Some dimmers offer low-end trim, an adjustment that limits how far they dim. Use the exact manufacturer's instructions; settings and procedures differ between models.
Expected result: The sconces start reliably, dim through a useful range, and operate without distracting flicker or noise. Any remaining limits are documented before the installation is considered finished.
Ask the electrician to demonstrate the final settings with you in the room. In a 2026 renovation handover, a working high-brightness setting alone is not a complete dimming test.
Record the final configuration
Keep the fixture model, bulb or driver identification, dimmer model, and final settings together. Add any manufacturer compatibility documents and the electrician's installation notes.
This record gives a future electrician a starting point. It also prevents a replacement bulb or wall control from silently changing a combination that previously worked.
When sconces share a control or switch location
The same matching process applies when you expand beyond a single wall control. The extra work is checking the whole group and every control location—not assuming that individually dimmable pieces will behave alike.
Several sconces on one dimmer
Ask your electrician to check the combined connected load and any manufacturer limits on fixture count. Prefer a documented, consistent driver or bulb combination rather than assuming different dimmable products will track together.
Best for: Coordinated sconces intended to brighten and dim as one group. The benefit is simple room control; the limitation is that every connected fixture must work with the same dimming method and control.
Sconces controlled from multiple locations
A hallway or bedroom can need control from more than one doorway. Ask your electrician whether the selected dimmer supports the existing multi-location arrangement and requires a specified companion control.
Best for: Rooms where convenient access matters at more than one entrance. The benefit is practical switching; the limitation is that another ordinary dimmer is not automatically a suitable companion.
Fixtures with dedicated smart controls
If the sconce has its own smart driver or controller, ask whether it requires constant power and whether upstream dimming is allowed. Do not place a smart fixture behind a wall dimmer unless its instructions explicitly support that arrangement.
Best for: Homeowners who want the fixture's documented app or remote functions. The benefit is access to those functions; the limitation is dependence on the specified control arrangement.
Troubleshooting dimmer problems
Use symptoms to guide your electrician—not to justify opening the switch box yourself. If you notice a burning smell, scorching, or abnormal heat, stop using the affected lighting and contact a qualified electrician promptly.
The sconces flicker near minimum brightness
Ask your electrician to check low-end trim, minimum load requirements, and the driver-dimmer pairing. Raising the minimum setting can help when the documented combination supports adjustment, but trim cannot correct every mismatch.
The lights dim down but will not restart low
Demonstrate the difference between dimming down and switching on from the same setting. Ask the electrician to check supported start-level or trim adjustments and confirm that the remaining range meets your needs.
The dimmer or fixture buzzes
Report where the sound comes from and at which settings it occurs. Ask your electrician to verify the approved control type, connected load, and installation; do not treat a buzzing replacement as acceptable simply because the light turns on.
Matching sconces produce different brightness
Check the order records for different variants, bulb models, or driver specifications. Have the electrician investigate persistent differences rather than assuming that changing the wall control will solve them.
The light stays faintly lit when switched off
Some electronic controls pass a small current even when nominally off. Ask your electrician to investigate the control design, wiring, and manufacturer-approved remedies; do not add improvised components to the circuit.
Customize your workflow
Once compatibility is settled, decide what the sconces should contribute to the room. A compatible dimmer does not change a fixture's beam direction, shade glare, or fixed light color, so judge those characteristics separately before ordering.
For your 2026 selection checklist, keep three questions together: does the fixture fit the wall, does its light suit the activity, and does its documented control method fit the installation? Norafurnish offers fixture choices and practical buying guidance, but the electrician must confirm the electrical match.
FAQ
Can any LED dimmer switch work with a dimmable wall sconce?
No. The dimmer must match the bulb or driver's supported dimming method, load requirements, and installation conditions. Dimmable does not mean compatible with every LED control.
What should I ask my electrician before buying a dimmer?
Ask which exact dimmer model matches your fixture's driver or bulbs and the existing circuit. Request checks of dimming method, load limits, neutral requirements, and any additional switch locations.
Can I keep my existing dimmer when I replace wall sconces?
Keep the existing dimmer only if your electrician confirms compatibility with the new fixture or bulbs. A control that worked with the previous lighting is not automatically suitable for the replacement.
Is reverse-phase dimming always better than forward-phase?
No. The correct choice is the method supported by the specific driver or bulb. Select the control from documented compatibility, not from a general ranking of dimmer types.
Why do my LED sconces flicker only when dimmed?
Low-setting flicker can result from an incompatible control, load requirements, or an unsuitable minimum setting. Have your electrician check the combination and adjust supported settings before replacing components.
Can I put a smart wall sconce on a dimmer?
Only if the smart fixture's instructions explicitly permit upstream dimming. Some smart fixtures require constant power and use a dedicated app, remote, or controller instead.
Can several LED sconces share one dimmer?
Yes, when the dimmer and every connected fixture support that arrangement. Your electrician must check combined load, fixture-count restrictions, and whether the fixtures dim consistently together.
One last thing
Test switching on at your preferred low setting—not just dimming down to it. A sconce that looks comfortable after fading from full brightness can still fail to start reliably at that same setting.
Before closing your 2026 installation file, save the model numbers and final adjustments. That small record protects the next lighting decision from becoming another compatibility search.